

I know it’s usually harder to crochet in the warmer months. I say turn up the AC and make some tea and just do it. As someone who’s always cold, it works out for me 😉 But I decided to look forward to spring a few months early this year. My mom had picked up this sage color of Caron One Pound for me a while back (like, years ago), and it was calling out “springtime” for me. So I found the perfect complimentary cream color and set out to make a sunnier days blanket.
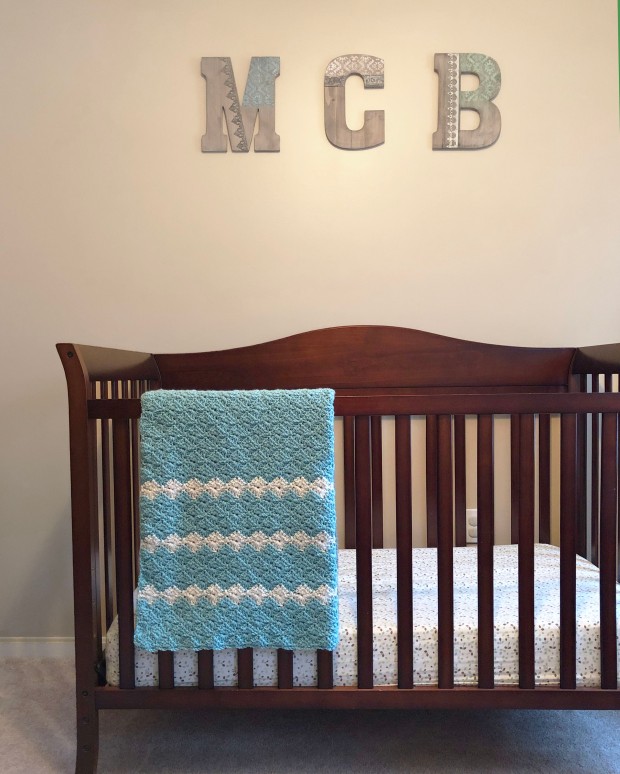
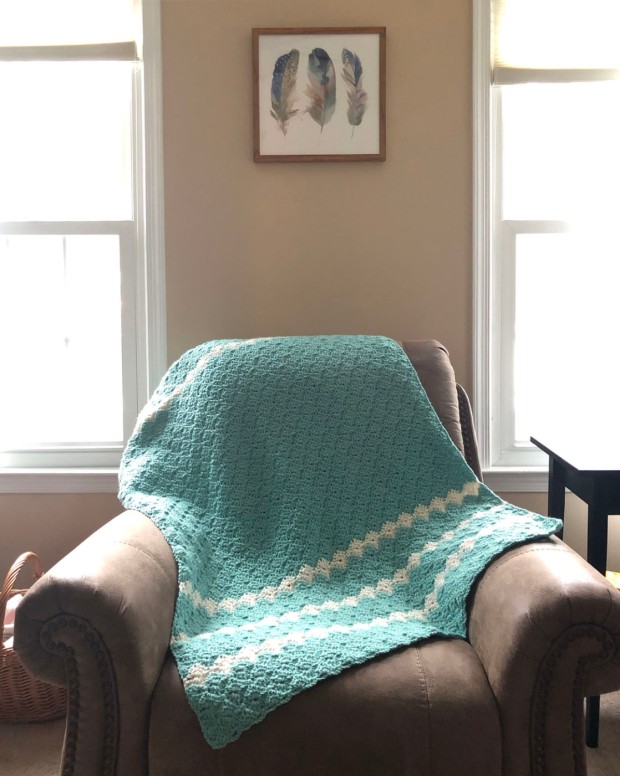
I won’t lie, I originally planned to make this a throw blanket. But it was my first time using the harlequin stitch and I didn’t know just how much it would shrink up. BUT – it all turned out fine in the end, because baby blankets are my fave and this one will fit perfectly in my 1 year old’s room. It’s a little bigger than a standard baby blanket, measuring 36 x 52 inches. But that’s the perfect size for a toddler or crib blanket (literally perfect – that’s exactly how big crib mattresses are!). As a bonus it also works as a lapghan. It kept me pretty cozy on the couch while I finished it up 🙂 I’ll include instructions in the pattern for making a traditional baby blanket as well as a throw size.

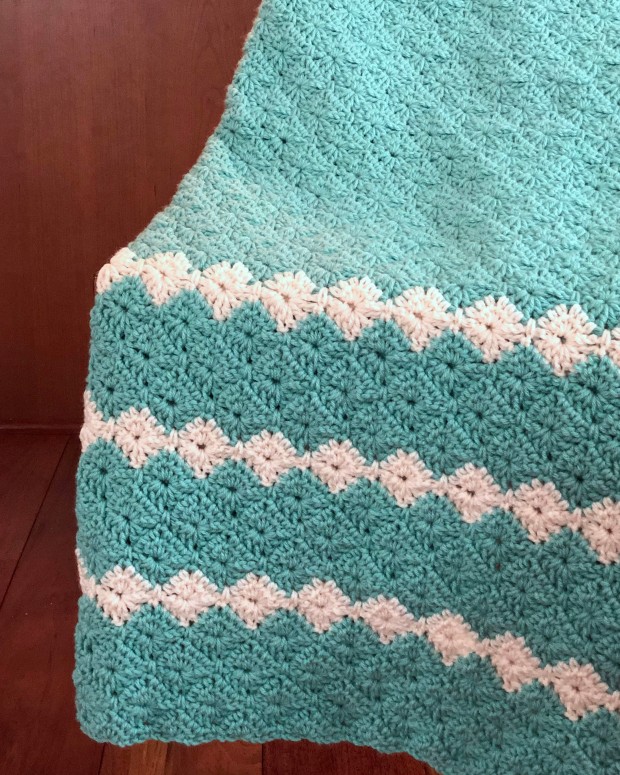
Lately I’m really into texture. I love understated designs, and texture is a beautiful way to add details while keeping the colors and design simple. I first saw the harlequin stitch on Daisy Farm Crafts, and knew I wanted to make a blanket using mostly one solid color. The stitch creates diamond shape but reminds me of foliage, so of course perfect for my spring theme. (I also could go for a light blue and bright white version – a little Elsa/snowflake vibe. But maybe next winter.)
Daisy Farm Crafts has a great tutorial on their site, which I used to practice the stitch before setting out to design the blanket. I ended up using the suggested 5.5 mm hook (as suggested on the yarn label – I did try one size up and one down).
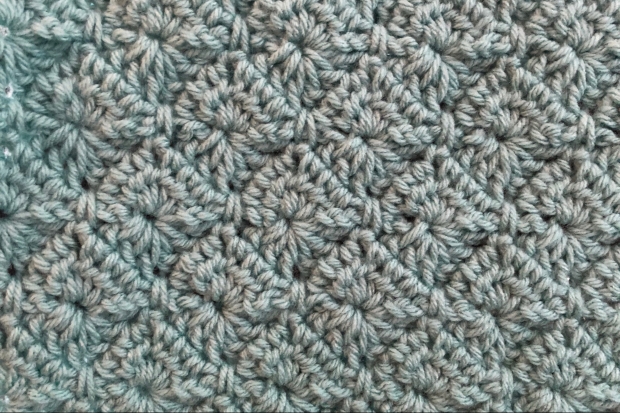
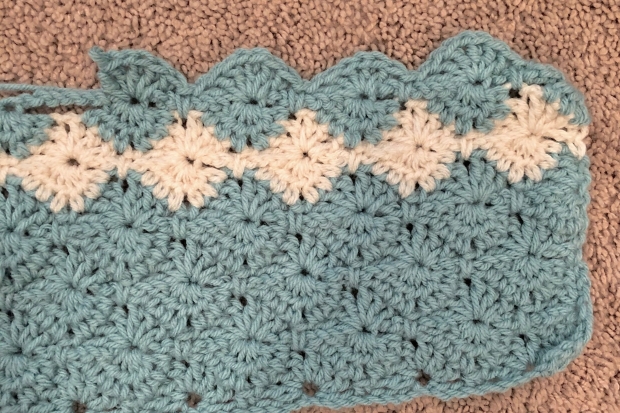

I love the way the texture turned out. Well worth learning a new stitch! I’m also really pleased with the colors. I’d love to make one in cream with navy stripes, too. Or ice blue with white for a snowflake/winter inspired blanket.
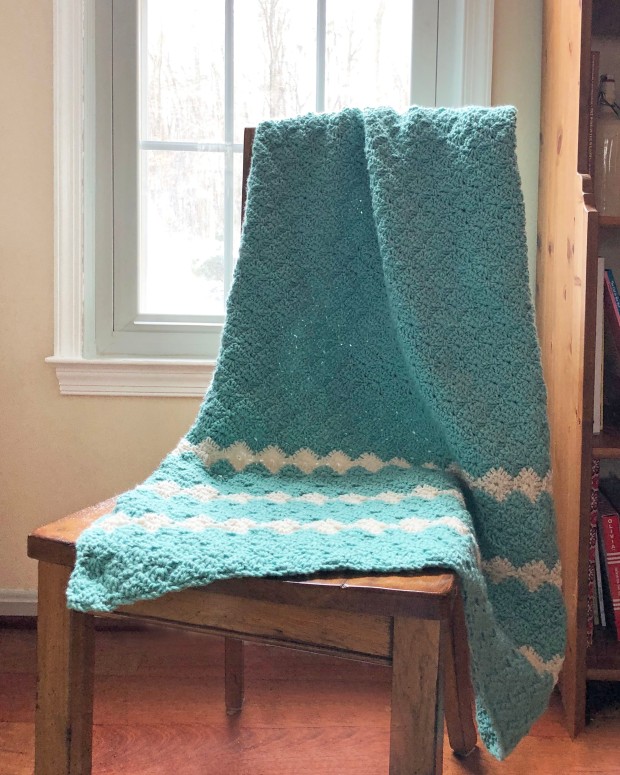

Meadow Crib / Lapghan Blanket
Materials:
- 2 skeins of your color 1 ( I used Caron One Pound in the color Sage and went through about 1 1/3 skeins total)
- 1 skein of color 2 ( I used Red Heart Super Saver Jumbo in Aran)
- 5.5 mm hook
- Tapestry needle
- Scissors
Gauge:
- 2 horizontal harlequin stitches per 4 inches
- 4 rows per 4 inches
Size:
35 x 52 inches

Adaptations:
This pattern is for a crib or lapghan sized blanket. To increase or decrease the size of your blanket, your foundation row must be in multiples of 8+1. Each multiple of 8 will make 1 diamond, and each diamond using this gauge is just under 2 inches wide. Below are my suggestions for different sizes:
Throw (50 x 60 in):
- Chain 201; after the first set of color 2 stripes, complete 26 1/2 iterations in color 1 before beginning the second set of color 2 stripes.
Baby blanket (36 x 42 in):
- Chain 145; after the first set of color 2 stripes, complete 5 1/2 iterations in color 1 before beginning the second set of color 2 stripes.
Pattern:
Foundation row: Chain 145.
Row 1: In the 5th ch from hook, complete [3 dc, ch 1, 3 dc]. *Skip 3 ch. Sc in the 4th ch. Skip 3 ch. In the 4th ch, complete [3 dc, ch 1, 3 dc].* Repeat * to the end of the row. You will end the row with skipping 3 ch and sc in the last ch. You will have 18 peaks (or shells or half diamonds, however you prefer to look at it). Ch 3 and turn.
Row 2: Dc3tog over the next 3 dc. *Ch 7, dc6tog over the next 6 dc, skipping the ch 1 between the first and last 3 dc (at the bottom of the “valley”). * Repeat * until the final full “valley.” End the row with dc3tog, ch 3, dc into the top of the last ch. Ch 1 and turn.
Row 3: Complete 3 dc between the turning ch and last dc of previous row. *Sc into the ch 1 sp from Row 1’s “peak” (you will essentially “trap” or tie down the ch 7 from Row 2). Complete [3 dc, ch 1, 3 dc] into the center of the next dc6tog from the previous row.* Repeat * through the last dc6tog from the previous row. End with 3 dc into the dc3tog from the previous row. Dc into the top of the turning ch. Ch 4 and turn.
Row 4: Dc6tog across the next 6 dc, skipping the ch 1 between the first and last 3 dc (at the bottom of the “valley,” just as in Row 2). *Ch 7. Dc6tog across the next 6 dc, skipping the ch 1 between the first and last 3 dc.* Repeat * until the end of the last full “valley.” End the row with ch 3 and sc into the base of the turning ch. Ch 1 and turn.
Row 5: Complete [3 dc, ch 1, 3 dc] into the center of the first dc6tog from previous row. *Sc into the ch 1 sp from Row 3’s “peak” (just as you did when completing Row 3). Complete [3 dc, ch 1, 3 dc] into the center of the next dc6tog from the previous row.* Repeat * through the last dc6tog. Sc into the top of the turning ch. Ch 3 and turn.
Rows 6-7: Repeat rows 2-3. On the last pull through of row 7, complete a color change by pulling through your second color.
Rows 8-9: Repeat rows 4-5. On the last pull through of row 9, complete a color change by pulling through your first color.
Rows 10-13: Repeat rows 2-5.
Rows 14-15: Repeat rows 2-3. On the last pull through of row 10, complete a color change by pulling through your second color.
Rows 16-17: Repeat rows 4-5. On the last pull through of row 10, complete a color change by pulling through your first color.
Rows 18-21: Repeat rows 2-5.
Rows 22-23: Repeat rows 2-3. On the last pull through of row 10, complete a color change by pulling through your second color.
Rows 24-25: Repeat rows 4-5. On the last pull through of row 10, complete a color change by pulling through your first color.
Rows 26-65: Repeat rows 2-5 ten times.
Rows 66-67: Repeat rows 2-3. On the last pull through of row 10, complete a color change by pulling through your second color.
Rows 68-69: Repeat rows 4-5. On the last pull through of row 10, complete a color change by pulling through your first color.
Rows 70-73: Repeat rows 2-5.
Rows 74-75: Repeat rows 2-3. On the last pull through of row 10, complete a color change by pulling through your second color.
Rows 76-77: Repeat rows 4-5. On the last pull through of row 10, complete a color change by pulling through your first color.
Rows 78-81: Repeat rows 2-5.
Rows 82-83: Repeat rows 2-3. On the last pull through of row 10, complete a color change by pulling through your second color.
Rows 84-85: Repeat rows 4-5. On the last pull through of row 10, complete a color change by pulling through your first color.
Rows 86-89: Repeat rows 2-5.
Rows 90-91: Repeat rows 2-3.
Row 92: Repeat row 2, replacing each ch 7 with the following: ch 3, sc into the ch 1 sp (the top of the “peak”) from the previous row, ch 3. End the row with ch 3 and sc into the top of the turning ch.
Weave in your loose ends with a tapestry needle. TIP: Following the peaks and valleys of the stitches will help ensure the ends won’t come loose.
(c) Nicolle Bernard, 2018
This post may contain affiliate links for products I use and love.
Pin me!


It’s beautiful Nicolle!
LikeLike